
Adding rain to your footage is one of the fastest ways to create mood and atmosphere. In this tutorial, you’ll learn how to add a rain overlay video in Adobe Premiere Pro using a free, looping rain clip — plus an optional editable rain MOGRT if you want more control.
This method works in any recent version of Premiere Pro and doesn’t require After Effects.
Watch: Rain Overlay in Premiere Pro (2:52)
Download the Free Rain Overlay
Before we start, download the free assets used in this tutorial:
How to Add a Rain Overlay Video in Premiere Pro
Step 1: Place the Rain Overlay Above Your Footage
Open Premiere Pro and import the rain overlay video into your project.
- Drag your main footage onto the timeline
- Place the rain overlay clip on the video layer above your footage
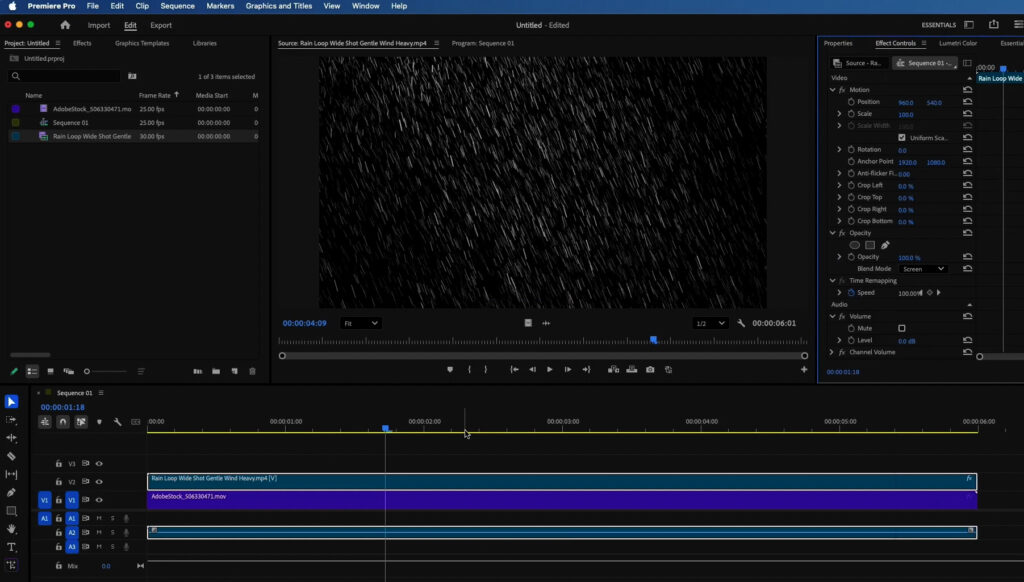
At this stage, the rain clip will usually have a black background.
Step 2: Remove the Black Background Using Blend Modes
To make the black background transparent:
- Select the rain overlay clip
- Go to Effect Controls
- Open Opacity
- Change the Blend Mode to Screen
This instantly removes the black areas and leaves only the rain visible.
Step 3: Add Depth by Duplicating the Rain Layer
To create more realistic rain, we’ll layer it:
- Duplicate the rain overlay clip
- Hide the top copy for now (this will become the foreground rain)
With the lower rain layer selected:
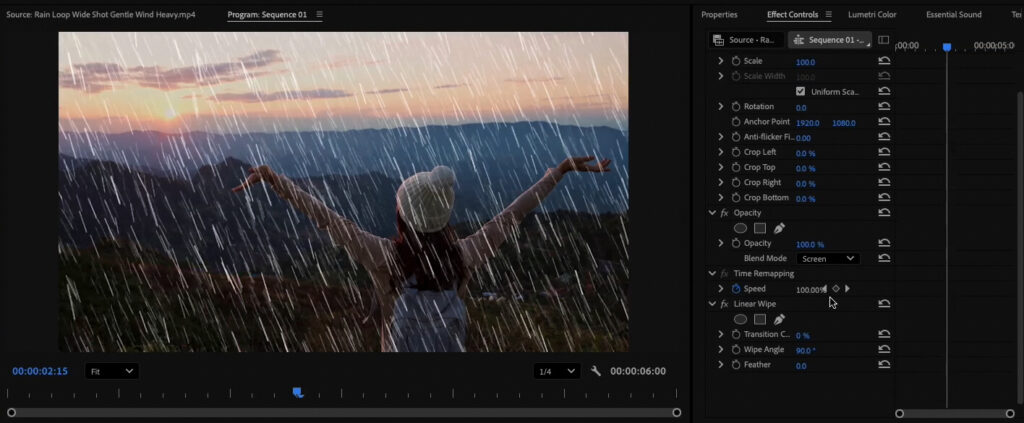
- Go to Effects → Video Transitions
- Double-click Linear Wipe
- Adjust the transition to roughly match the horizon in your shot
- Set the Angle to 0
- Reduce the Opacity to around 40%
This creates background rain that feels more distant.
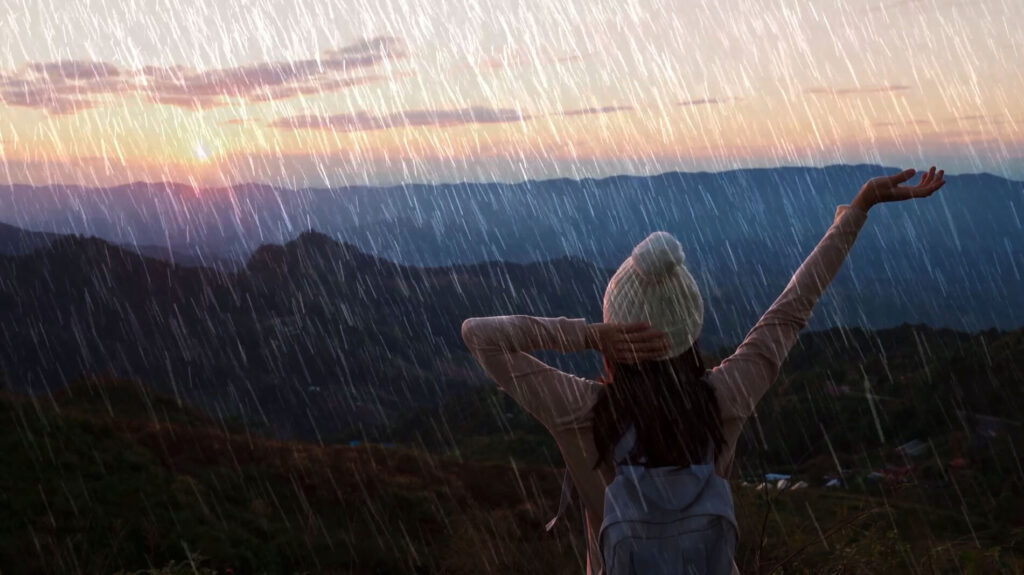
Step 4: Create Foreground Rain
Now enable the top rain layer (foreground):
- Scale it up to 200%
- Reduce the Opacity to around 20%
If the rain looks too sharp or pixelated:
- Go to Effects → Blur & Sharpen
- Apply Gaussian Blur
- Set the blur to around 6 pixels
You now have layered rain with depth — instantly.
Optional: Use an Editable Rain Overlay (MOGRT)
If you want more control over the rain — without going into After Effects — you can use an editable rain MOGRT.
This gives you controls for:
- Rain amount
- Wind direction
- Speed
- Floor level
- And more
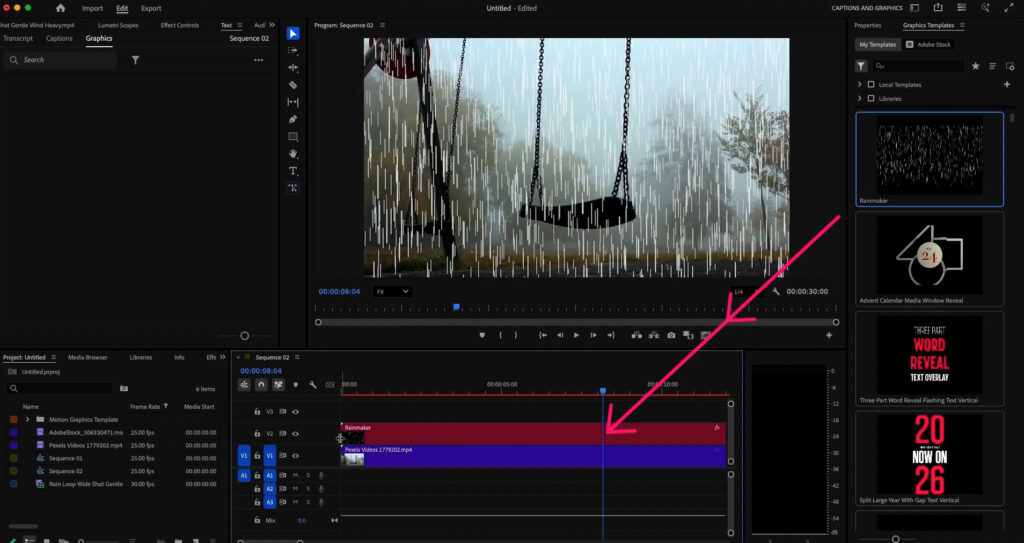
How to Install the Rainmaker MOGRT
- Switch to the Captions and Graphics workspace
- Click Install Motion Graphics Template (top-right)
- Locate and install the Rainmaker MOGRT file
- Drag the template over your footage
- Double-click it to open Properties
You can even duplicate the MOGRT and stack layers for additional depth — just like the video overlay method.
Video Overlay vs MOGRT: Which Should You Use?
Use a rain overlay video if you want:
- The fastest setup
- Maximum realism
- Minimal tweaking
Use a rain MOGRT if you want:
- Editable rain behavior
- Consistent results across shots
- A workflow closer to After Effects (inside Premiere Pro)
Both methods work well — it depends on how much control you need.
Final Result
That’s it — instant rain in Premiere Pro, using either a free rain overlay video or an editable MOGRT.
If you found this useful, check out our other Premiere Pro effects tutorials and free overlays.
Want more rain overlays?
If you need more variety, check out our Rain Overlay Animation Pack — a collection of 30 realistic, loop-ready rain overlays designed for professional video work. All clips are delivered in 4K Ultra-HD and are ideal for adding subtle atmosphere and motion to static shots in Premiere Pro or any other editor.