What are Motion Graphics Templates (MOGRTs)?
Motion Graphics Templates, or MOGRTs, are installable project files that enable quick and easy, yet professional video and text effects. You can use MOGRTs to create instant video titles, lower thirds, transitions, and overlay VFX effects.
What’s more, the beauty of Motion Graphics Templates is that you can create multiple style variations from a single file.

With one MOGRT file users can create countless animated video clips – changing text, colors and style for each.
What Software is Needed to Use MOGRT Files?
MOGRT files are native to Adobe Premiere Pro, so a Creative Cloud subscription is required to use them.
Premiere Pro is industry-leading video editing software for film, broadcast and web – for beginners and professionals alike. You can read more about the editing power of Premiere Pro here.
For a free trial of Premiere Pro use the link below.
Premiere Pro Free TrialHow to Install and Edit MOGRT Files
MOGRTs will not ‘open’ when you double-click the file. To view and use a MOGRT it must first be imported into Premiere.
Here’s the easiest way of importing MOGRTs into Premiere Pro.
1. In Premiere open an existing Sequence or create a new one
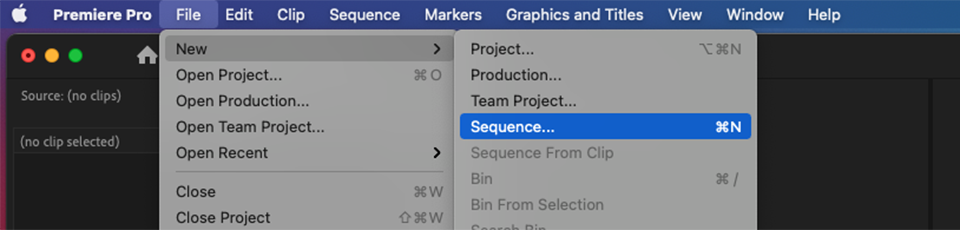
Before you import the MOGRT, be sure to have a Sequence ready, so you have a Timeline on which to place and view the template. MOGRTs can only be viewed on the Premiere Pro Timeline.
2. Install the template into your Library
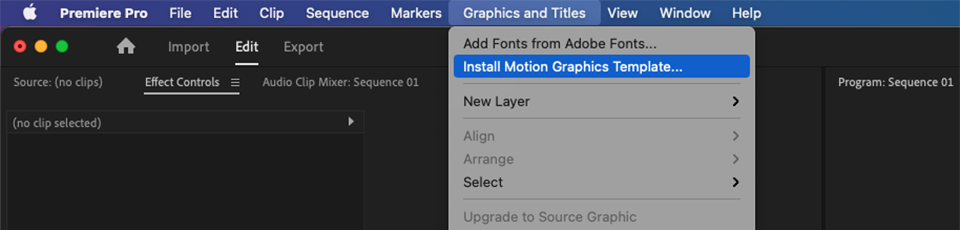
From Premiere’s title menu choose Graphics and Titles > Install Motion Graphics Template. This installs the template into your Premiere Library. Alternatively, open the Essential Graphics panel and simply drag the MOGRT file onto it.
3. Drag the template onto your Timeline
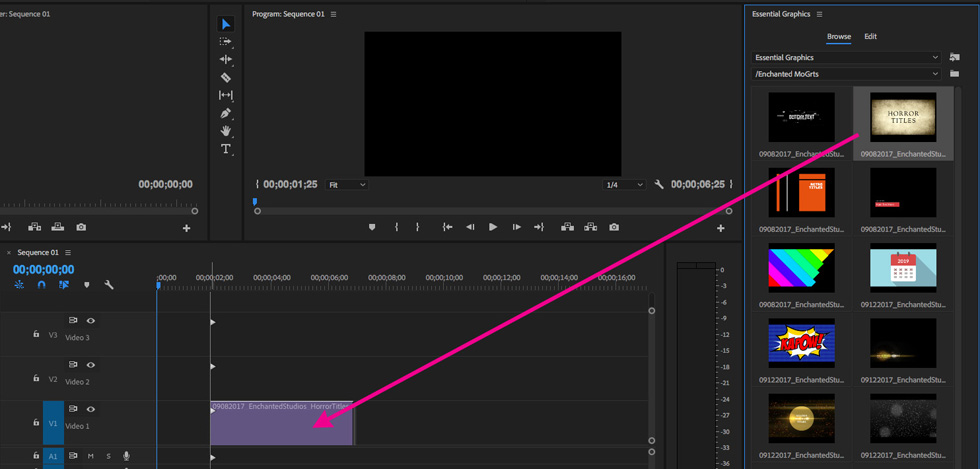
With the template thumbnail visible in the Essential Graphics panel you can now click and drag it to your Timeline, creating an ‘instance’. The instance will look like a media clip on the Timeline and can be moved, cut and trimmed as such.
4. Change the instance settings
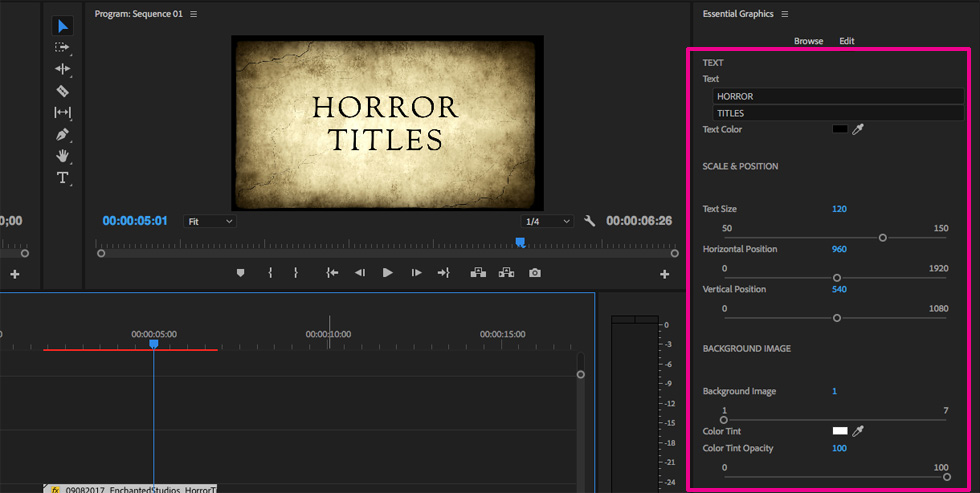
With the template instance clip now on your Timeline, select it to reveal its editable settings, shown in the Essential Graphics panel. Here you can change text, color and animation settings of the selected instance.
5. Add more instances for multiple variants
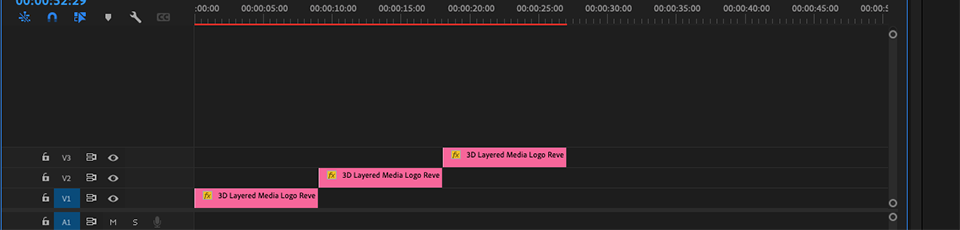
Dragging the MOGRT template from the Library once more creates a new, separate instance containing default settings. This allows for several, individually styled sequences from a single template. Handy, for example, when creating titles and lower thirds where multiple variations require the same visual style but with different text.
All MOGRT files use the same installation and application procedure. Please watch the following example video to see how it’s done from start to finish.
More About MOGRT Template Editing
With a MOGRT template instance added to your Timeline, selecting it will reveal the Edit panel. Note, the editable settings shown apply only to the selected instance.
The Edit panel will contain all editable text inputs, color, size and position controls for the template.
For MOGRT templates containing multiple visual or animation style options, you should look out for drop-down menus and checkboxes with relevant labels. On older MOGRTs drop-down menus were unavailable so any style controls will be adjusted using sliders.
The following short video shows MOGRT editing in action.
Media Replacement
If the MOGRT has Media Replacement options you can swap graphics, images, or video footage in specific places. These are normally labeled MEDIA REPLACEMENT in the Essential Graphics panel.
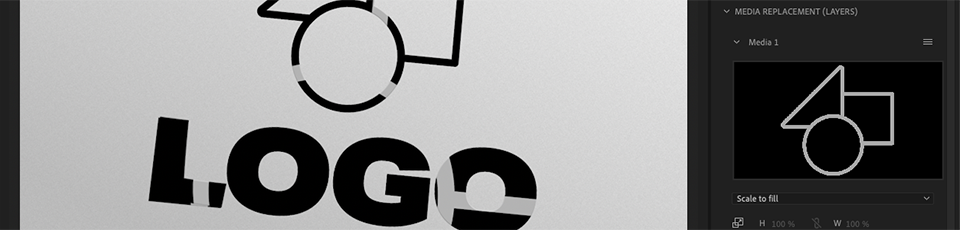
Media Replacement is perfect for logo reveal and photo gallery slideshow templates.
Simply drag an image or video from your Media Browser onto the appropriate thumbnail to replace it and use the controls under the thumbnail to adjust size or (if video) footage timing.
The Media Replacement feature is only available in Motion Graphics Templates created for Premiere Pro 2021 or later. Find out more about Media Replacement in MOGRTS here.
Duplicating Settings
Once you’ve set the style and colors of a template instance, on the Timeline, it is advisable to duplicate your edited clip so you don’t have to start again from default settings. You can duplicate the clip instance by holding down Alt (Mac) or Option (PC) and dragging a copy of it along the timeline or to a new video layer.
The Best Place to Find MOGRT Template Files
Adobe Stock has thousands of vetted, premium MOGRT templates to choose from, each one created by approved MOGRT authors and thoroughly checked by the Adobe team for usability and performance.
Plus, with an Adobe Stock subscription, you can choose up to 25 premium MOGRT files free every month (at September 2022).
Grab a free Adobe Stock 30-day trial from the following link.
Try Adobe Stock for free!Where to Get Free MOGRTs
Actually, Adobe Stock is also a great place to find free MOGRT templates.
Free MOGRT Templates from Adobe StockThat’s all for now!
Please share this awesome page of inspiration with others and be sure to follow our YouTube channel for more video content freebies!