
Introduction In the world of digital content creation, high-quality visuals and media assets are essential. Whether you’re a graphic designer, filmmaker, marketer, or content creator, you often rely on stock media platforms to source the perfect images, videos, music, and more. Two well-known platforms, Adobe Stock and Pond5, have been catering to the creative community for years. In this blog post, we will compare these platforms to help you make an informed choice. Adobe Stock: A Quick Overview Adobe Stock is Adobe’s stock media service that integrates seamlessly with Adobe Creative Cloud. This integration offers a massive advantage to those who use Adobe’s suite of creative software, including Photoshop, Illustrator, and Premiere Pro. The Adobe Stock library boasts millions of high-quality assets, including images, videos, templates, 3D assets, and more. Here are some key points to consider: Pond5: A Quick Overview Pond5, on the other hand, is a marketplace for… read more
After Effects
About Adobe After Effects and After Effects templates.

Top Sites for Free After Effects Templates When it comes to creating stunning motion graphics or visual effects, Adobe After Effects stands out as a powerhouse. But while the software is incredibly versatile, crafting professional-looking animations from scratch can be time-consuming. That’s where free After Effects templates come in handy. Whether you’re a seasoned video editor or a newbie, using templates can save time and enhance your creativity. In this blog post, we’ll explore some of the best sites to download After Effects templates for free. We’ve chosen to ignore the illegal file-sharing websites which offer lots of free templates but behind throttled download speeds and dubious licensing. The following are legitimate offerings from the very best sites in motion graphics design. Why Use After Effects Templates? Before diving into the list of sites, let’s quickly look at why editable video templates are a game-changer: Best Free After Effects Templates… read more
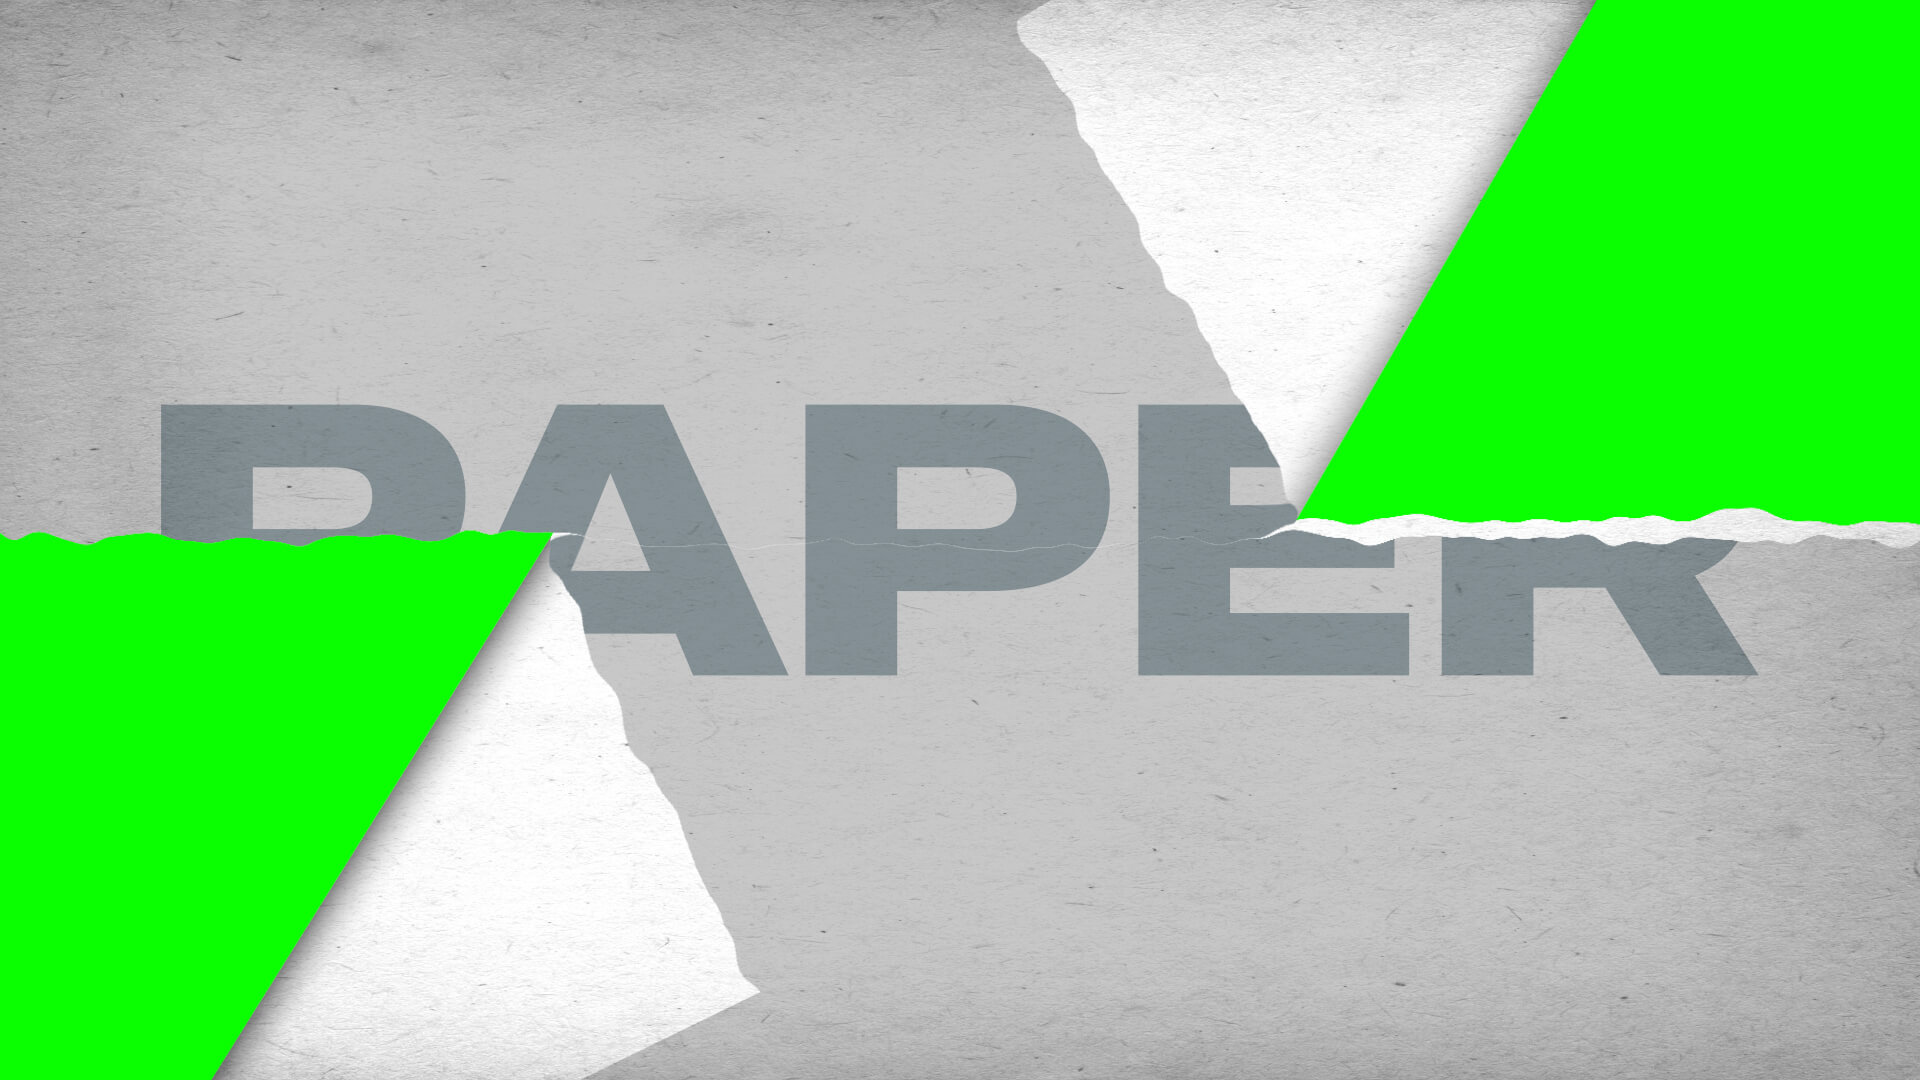
How to create a torn paper transition in After Effects Creating torn paper transition effects can add a unique, textured look to your video projects, giving them a handmade, organic feel that stands out from more typical transitions. These effects are especially popular in creative projects such as music videos, scrapbooking-style videos, or any content looking to evoke a tactile, crafted aesthetic. In After Effects, the process of creating torn paper transitions is highly customizable, thanks to its robust compositing tools and masking capabilities. You can craft the exact look of torn edges, layer textures for added realism, and use keyframes to animate the transition between scenes. This approach gives you full control over the transition, allowing you to achieve a highly detailed, professional result. In this guide, we’ll walk you through how to create torn paper transition effects in After Effects, showing you step-by-step techniques that you can adapt… read more
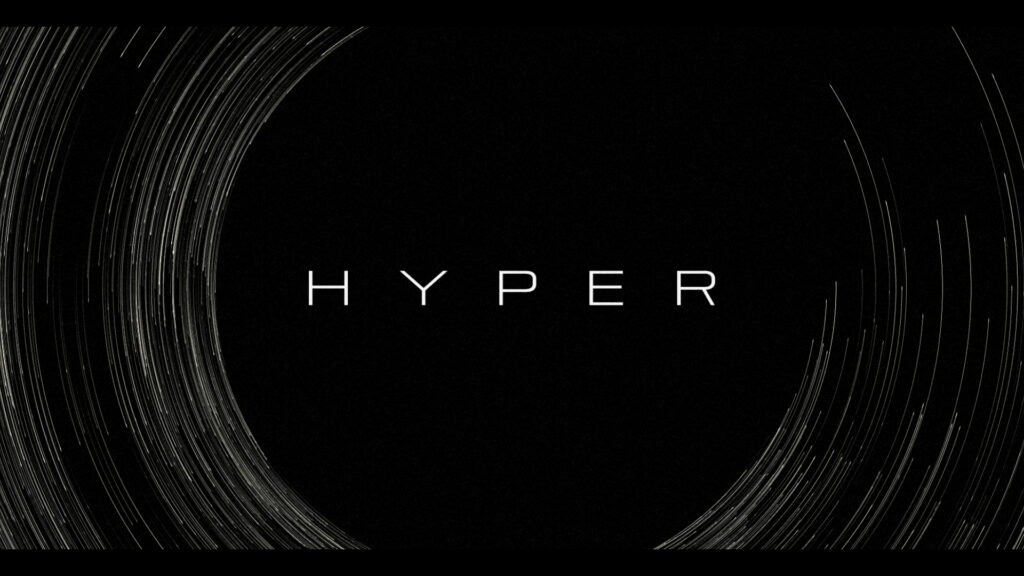
The goal was to create an atmospheric title sequence using only the built-in Adobe After Effects tools and without using any external images or footage. Firstly we wanted faded lines, akin to fiber optics, to be emitted horizontally from the side of the screen. After experimenting with CC Particle World using the default lines it was obvious that a bespoke particle would be needed. A long, thin Solid layer was faded using a Gradient Ramp of white to black. An additional tiny white Solid square was added for the tip. This formed the particle element. In a CC Particle World composition the Particle Type was changed to Textured Square and the Texture Layer set to our new particle element. For Physics, the Animation was set to Direction Axis with 0.10 Velocity and zero Gravity. Extra and Extra Angle values were zeroed out. Once done, it was time for some variations…. read more
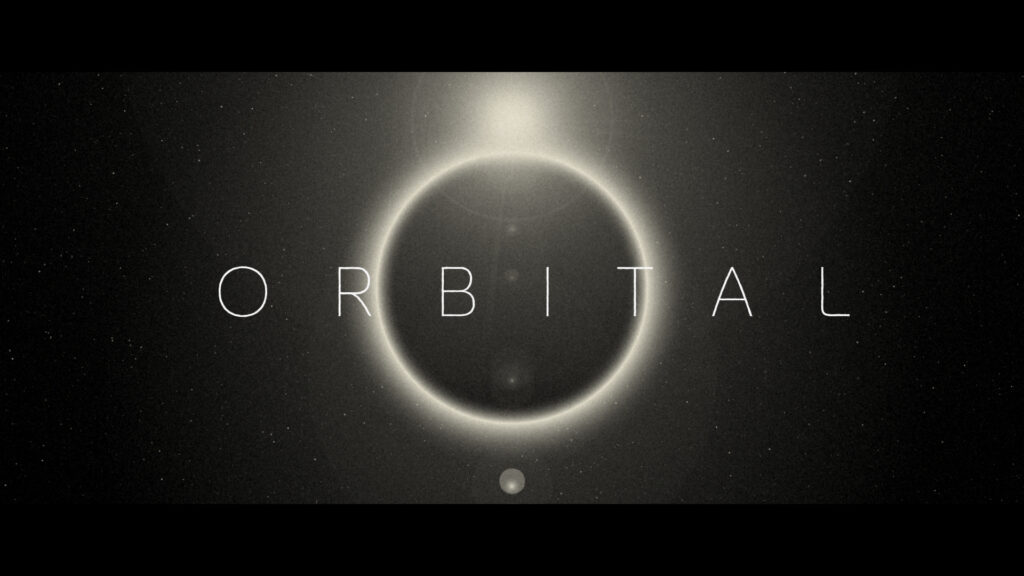
The goal was to create an atmospheric title sequence using only the built-in Adobe After Effects tools and without using any external images or footage. After some initial layout sketches were done, several scene compositions were created using just circular Shape layers. Using Layer Styles, adding a combination of Inner Glow and Outer Glow it was possible to create a realistic, spherical look. This was then applied to all the circle shapes. The ‘spheres’ were attached to Nulls and rotated to achieve the appearance of planets orbiting a sun. Lens Flare, Glow and CC Lens effects were added to provide additional brightness and distortion to the sun elements. Text was added over the top. Good Headline Pro Light was chosen as an elegant, timeless typeface that sits well within the concept of a vast solar system. CC Star Burst was used in the background of each scene to add faint… read more
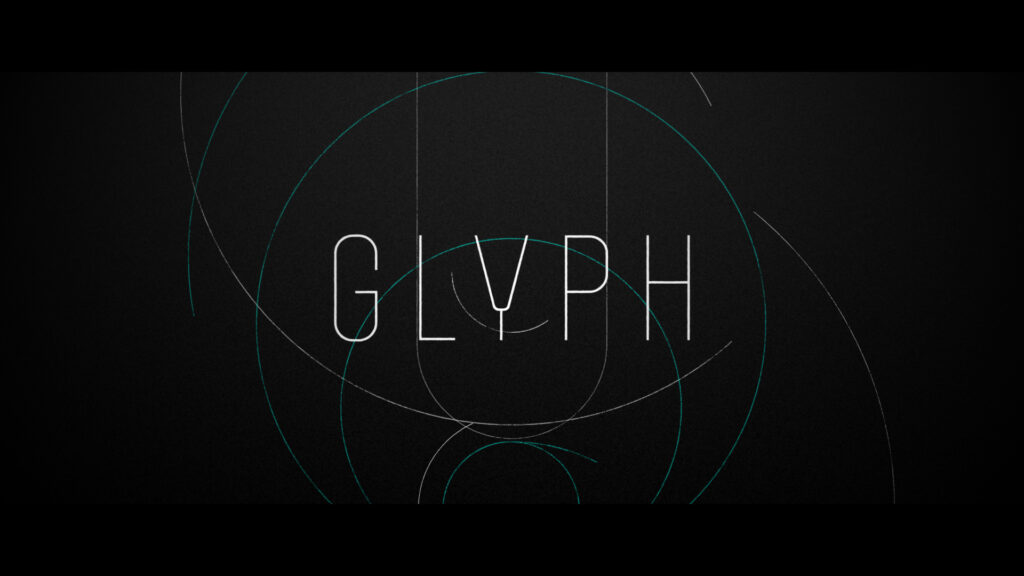
The goal was to create an atmospheric title sequence using only the built-in Adobe After Effects tools and without using any external images or footage. Firstly, admittedly, Adobe Illustrator was used to create the lozenge shapes which were imported into After Effects. Though, to animate these they had to be converted into Shape layers inside of After Effects. The lozenge shapes could have been formed directly inside After Effects but Illustrator is much more suited to this design task. Once the layered Illustrator files were imported and converted to shapes a Stroke was added, along with a Trim Paths effect. With an End Point of 50% the Offset was animated with the expression ‘time*40’ which moved the line going around the shapes at the desired speed. Each Shape layer was switched to 3D and their Z positions moved backwards in 3D space. To add texture to the lines a Solid… read more
Sponsored Resources

- Why Your Brand Needs Adobe Express
- What is Adobe Express and Why It’s the Secret Weapon for Creators
- The Best Free AI Video Generators for TikTok, Reels & YouTube
- Best AI Video Tools for Business in 2025: Voice, Avatar & Automation Included
- Ranking Every Star Wars Movie (from Worst to Best – 2025)

-
 Fusion – Hi-Tech Logo Reveal Pack for Premiere Pro
 - Clean Corporate Logo Reveal Pack for Premiere Pro
- Old Vintage Tintype Media Filter – Premiere Pro Template
